

Table of Contents
- What the Commercial Dental Office Renovation Timeline Actually Looks Like
- Dental Office Construction Phases, Start to Finish
- The Dental Tenant Improvement Permit Process, Step by Step
- Managing Dental Practice Downtime During Construction
- Hiring a General Contractor for Dental Practice Renovations
- What Actually Stretches a Commercial Dental Office Renovation Timeline
- Frequently Asked Questions
Last Updated: October 9, 2026
What the Commercial Dental Office Renovation Timeline Actually Looks Like
A commercial dental office renovation timeline is the sequence of design, permitting, construction, and equipment integration work that turns an existing space into a functioning clinical practice. According to industry analysis from IBISWorld’s 2026 dental offices industry report, there were roughly 181,000 dental office businesses in the country in 2026, growing at a 1.1% compound annual rate since 2021, which means competition for well-located, well-built clinical space keeps intensifying.
Below, we break the renovation down phase by phase and explain how to keep a practice running while the walls come down.
The schedule rarely fails during construction. It fails before the first hammer swings, when permits and equipment orders are treated as afterthoughts instead of critical-path items.
Why Published Estimates Differ So Much
Published renovation estimates range from 11 to 18 weeks for a full renovation, 3 to 6 months from design completion to operational readiness, and 6 to 9 months for a leasehold-improvement build, according to Lean Dental Design’s renovation planning guide. A ground-up build that includes site work, foundation, and envelope construction sits in an entirely different category, and Terrapin Construction Group’s 2026 cost and timeline analysis places that work at 8 to 14 months.
Before comparing your project to any published figure, define your start and end points. “Design complete to first patient” and “lease signed to first patient” can differ by two months on the same job.
| Schedule Definition | Typical Range | What It Measures |
|---|---|---|
| Design completion to operational readiness | 3-6 months | Design handoff through move-in |
| Full renovation, construction only | 11-18 weeks | Demolition through punch list |
| Leasehold improvement build | 6-9 months | Lease signing through opening |
| New York metro buildout | 18-30 weeks | Lease signing through opening |
| Ground-up construction | 8-14 months | Site work through buildout |
Dental Office Construction Phases, Start to Finish
Every dental office construction project moves through the same broad sequence, though each stage’s duration shifts with scope: pre-construction and design, demolition, rough-in, finishes, and equipment installation.
Pre-Construction, Design, and Demolition
Pre-construction is where the floor plan design gets locked, and it is the cheapest place to make changes. Moving an operatory wall on paper costs nothing. Moving it after rough-in costs real money and weeks.
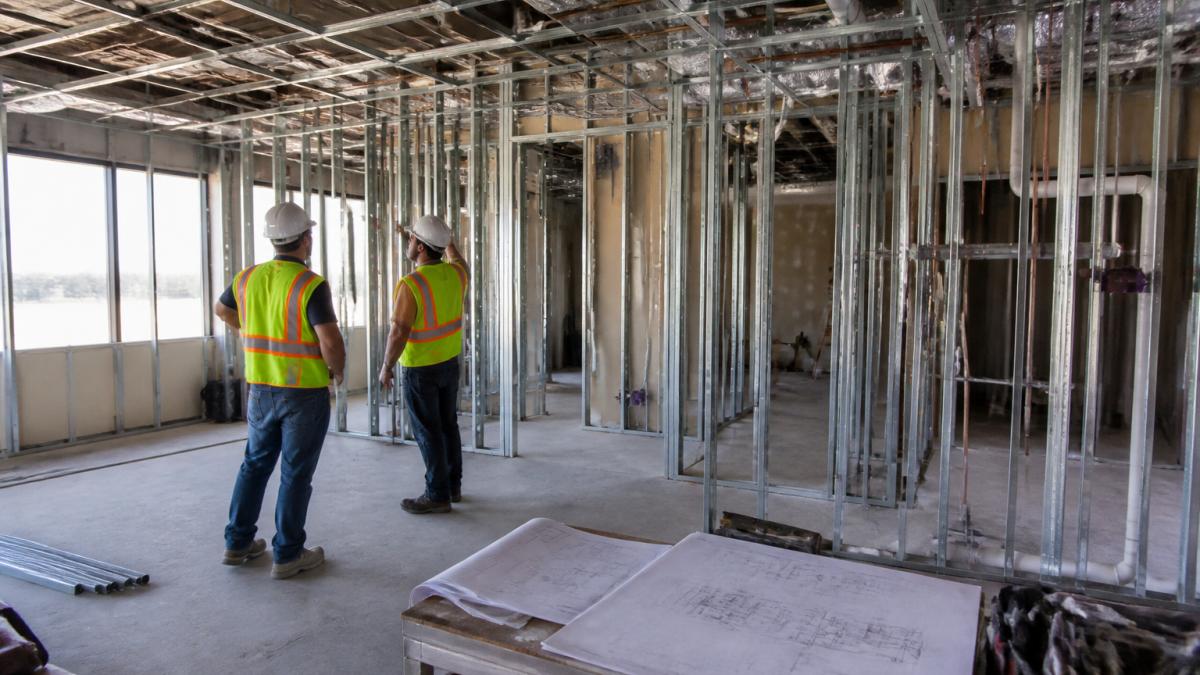
Demolition follows permit issuance. In a tenant-finish project, crews strip the commercial shell back to structure, remove outdated infrastructure, and prepare for new mechanical, electrical, and plumbing runs.
Rough-In, Finishes, and Equipment Installation
Rough-in covers the mechanical, electrical, and plumbing work (MEP) that must be inspected before walls close. Dental operatories carry heavier requirements than standard office space: dedicated circuits, vacuum lines, compressed air, and water supply at specific pressures.
Equipment installation comes last and is not a one-day event. Dental chairs, imaging units, sterilizers, and cabinetry arrive on separate schedules and need connection, calibration, and testing before the space is clinically functional.
Scheduling equipment delivery for the same week as the final walkthrough is a common mistake. If a chair arrives damaged or a connection point is wrong, the practice sits idle while the replacement ships.
The Dental Tenant Improvement Permit Process, Step by Step
The dental tenant improvement permit process is the approval sequence a local building department requires before construction can legally begin. It typically takes 1 to 3 months, according to Keystone Dental Builders’ construction timeline breakdown, while other published renovation schedules place it at 4 to 8 weeks.
Here is how the sequence runs:
- Confirm zoning and use – Verify the space is zoned for dental use and check parking and occupancy requirements.
- Prepare architectural and MEP drawings – A licensed design professional produces stamped plans covering floor plan design, mechanical, electrical, and plumbing.
- Submit for plan review – The building department reviews for compliance with building codes, accessibility standards, and life safety requirements.
- Respond to comments – Reviewers issue corrections; each round adds time, so a complete first submission matters.
- Pull the permit – Once approved, the permit issues and construction can legally start.
- Schedule inspections – Rough-in, framing, and final inspections must pass before the certificate of occupancy is issued.
The single biggest schedule saver here is a complete first submission. Incomplete drawings get kicked back, and each correction cycle can add weeks.
Managing Dental Practice Downtime During Construction
Downtime is the hidden cost that never shows up on a construction estimate. Every week a practice is closed is a week of lost production, so the goal is to shrink the closure window, not just the construction schedule, including the gap between “construction complete” and “first patient seen.”
Three construction approaches work, and they can be combined:
- Phased construction, Build out half the operatories while the other half stays in service, then switch. This extends the overall schedule but keeps revenue flowing.
- Temporary relocation, Move clinical operations to a temporary space while the main office is rebuilt. Faster on the construction side, but it adds lease and moving costs.
- After-hours work, Schedule noisy or disruptive trades outside patient hours. It can carry a premium, but it protects the appointment book.
The right choice depends on how many operatories you run. A single-chair practice usually cannot phase effectively; a five-chair practice often can. Phasing works when at least two operatories remain fully operational through each stage and the practice can tolerate a temporary reduction in daily capacity.
The Post-Occupancy Transition Nobody Plans For
The construction schedule ends at the certificate of occupancy; the practice schedule ends at the first patient. Those are not the same date, and the gap between them is where opening-week chaos lives.
The transition period typically includes:
- Staff training on new equipment and software, New chairs, imaging units, and practice management software all require hands-on training before staff can use them at full speed.
- Licensing and credentialing updates, If the practice address changed, payer credentialing and any facility-related registrations need to be updated before claims can be processed cleanly.
- Inventory, supplies, and instrument sterilization setup, The clinical supply chain has to be physically in place and validated before the first patient.
Build a two-to-four week transition window into the project plan, separate from the construction schedule, and assign an owner for each transition item. The construction team’s job ends at occupancy; the practice’s job starts there, and the two need to overlap deliberately rather than sequentially.
Map your production calendar against the construction schedule before demolition starts. Identify the two or three highest-revenue weeks and protect them by scheduling disruptive trades around them, not through them. Then add a separate transition window after occupancy for training, credentialing, and soft opening, and protect that window the same way.
Hiring a General Contractor for Dental Practice Renovations
Hiring a general contractor for dental practice renovations is different from hiring one for a standard office fit-out.
Get a Free Project Estimate – Contact Us Today →
What to evaluate:
- Clinical project experience – Ask how many dental or medical tenant-finish projects the firm has completed and request references from those practice owners.
- Permitting familiarity – A contractor who knows your local plan review process can flag problems before submission.
- Subcontractor network – Dental rough-in needs trades who understand vacuum, compressed air, and dedicated circuit requirements.
At KRB Development, we have delivered commercial and residential construction since 2005, with hands-on leadership involved in daily operations rather than handed off after the contract is signed. The questions above will separate firms that have done this work from firms that have not.
What Actually Stretches a Commercial Dental Office Renovation Timeline
Two factors stretch schedules more than anything else, and neither is construction labor: equipment lead times and unexpected site conditions account for most overruns on clinical projects. A third, quieter factor, technology integration, is the one most practice owners discover too late.
Equipment Lead Times and Technology Integration
Dental equipment is not stocked inventory. Chairs, imaging systems, and sterilization equipment are often built to order, and lead times can run well past the construction schedule.
The mistake is treating “equipment” as a single line item. Long-lead dental equipment falls into four categories, each with a different ordering trigger:
- Operatory chairs and delivery systems, Built to order in many configurations. Order at permit submission, not at demolition.
- Imaging equipment (panoramic, CBCT, intraoral scanners), Often the longest lead item, and the one most sensitive to room dimensions and shielding requirements. Confirm the model and the room before drawings are finalized.
- Sterilization and cabinetry, Millwork and casework are frequently fabricated to the operatory layout. A late layout change resets the fabrication clock.
A practical sequencing rule: order long-lead equipment the day the permit is submitted, and confirm the delivery window against the rough-in inspection date.
Technology integration adds a second layer, with its own timeline that runs parallel to construction rather than after it:
- Design phase, Network cabling paths, server location, and low-voltage rough-in are decided alongside MEP drawings. If IT infrastructure is planned after drywall goes up, you are paying to open finished walls.
- Rough-in phase, Data cabling, imaging server placement, and dedicated circuits for imaging equipment are installed and inspected with the electrical rough-in.
- Pre-finish phase, Practice management software, imaging software, and cybersecurity configuration are staged so they can be tested on the actual network, not a temporary one.
The fix is sequencing: bring your IT vendor into design meetings before rough-in begins, and treat the imaging server and network as construction scope, not an afterthought.
A common pattern is a practice that finishes construction on schedule, then loses two to three weeks because the imaging server was never specified, the network was never tested, and the software was never configured on the real infrastructure. That gap is avoidable and it is entirely a planning problem.
Contingency Planning for Surprise Site Conditions
Opening walls in an older commercial building almost always reveals something: undersized electrical service, corroded plumbing, undocumented structural modifications, or HVAC that cannot support clinical air requirements.
The schedule buffer matters more than the dollar buffer on clinical projects, because the cost of a surprise is usually measured in lost production days, not just repair cost.
A workable decision rule looks like this:
- Under the threshold, The project manager authorizes the repair and documents it. No owner meeting required.
- Over the threshold, The owner is notified within 24 hours with a scope, a cost, and a schedule impact, and approves or redirects.
- Scope-changing discovery, If the finding changes the layout or the equipment plan, the design team is pulled back in before construction continues, not after.
The most common surprise categories in older commercial buildings are predictable enough to pre-inspect before demolition:
- Electrical service capacity, Dental operatories draw more than standard office space. An undersized panel is a common and expensive discovery.
- Plumbing condition and slope, Corroded lines and insufficient slope for vacuum and waste are frequent in older shells.
- Structural modifications, Prior tenants sometimes removed or added framing without documentation.
A pre-demolition walkthrough with the contractor, architect, and MEP engineer costs a fraction of a mid-construction surprise and frequently surfaces two or three of these conditions before they become schedule events.
Build the contingency as two separate numbers: a dollar reserve for repairs and a schedule reserve for the critical path. They protect against different risks, and a project can absorb one without the other.
Frequently Asked Questions
How long does a typical dental office renovation take?
It depends on scope. Published estimates put a full renovation at 11 to 18 weeks, while a leasehold-improvement build runs 6 to 9 months and design completion to operational readiness can span 3 to 6 months. A dental office renovation timeline is best read as a range set by your project scope, permit speed, and how early you order equipment, not as a single universal number.
What are the primary phases of a dental office construction project?
The dental office construction phases run in sequence: pre-construction and design, permitting and plan review, demolition and site preparation, rough-in for plumbing, electrical, and HVAC, then finishes, dental equipment installation, inspections, and certificate of occupancy. Skipping or compressing any phase shifts work downstream, so the schedule works best when each phase is planned with its own realistic duration.
How do I minimize practice downtime during a renovation?
Managing dental practice downtime during construction starts with sequencing. If part of the office can stay open, phase the work so treatment rooms remain usable while the back office or reception is rebuilt. Coordinate equipment installation and inspections outside patient hours, and set a firm reopening date with your contractor so staff and patients know when normal operations resume.
What permits are required for dental office tenant improvements?
Most jurisdictions require a building permit, a plan review, and separate trade permits for plumbing, electrical, and mechanical work, plus a certificate of occupancy before you reopen. The dental tenant improvement permit process typically takes 1 to 3 months, though local review cycles vary. Confirm zoning and building code requirements with your local building department early, since plan review is a common schedule driver.
How does equipment installation impact the construction schedule?
Dental equipment installation depends on long-lead items like chairs, cabinetry, compressors, and imaging systems. Permits, long-lead items, and inspections are named schedule drivers in dental construction, so order equipment as early as the design allows. Delivering and installing equipment before finishes are complete can also create rework, so coordinate delivery dates with your contractor’s construction schedule.
Should I choose a tenant-finish or ground-up build?
A tenant-finish project renovates an existing commercial shell, which is usually faster and less disruptive because the structure, envelope, and utilities already exist. Ground-up construction adds site work, foundation, and structural phases, pushing timelines to 8 to 14 months. If your practice needs to open quickly, a tenant-finish build-out in an existing shell is generally the shorter path.